Test flow overview
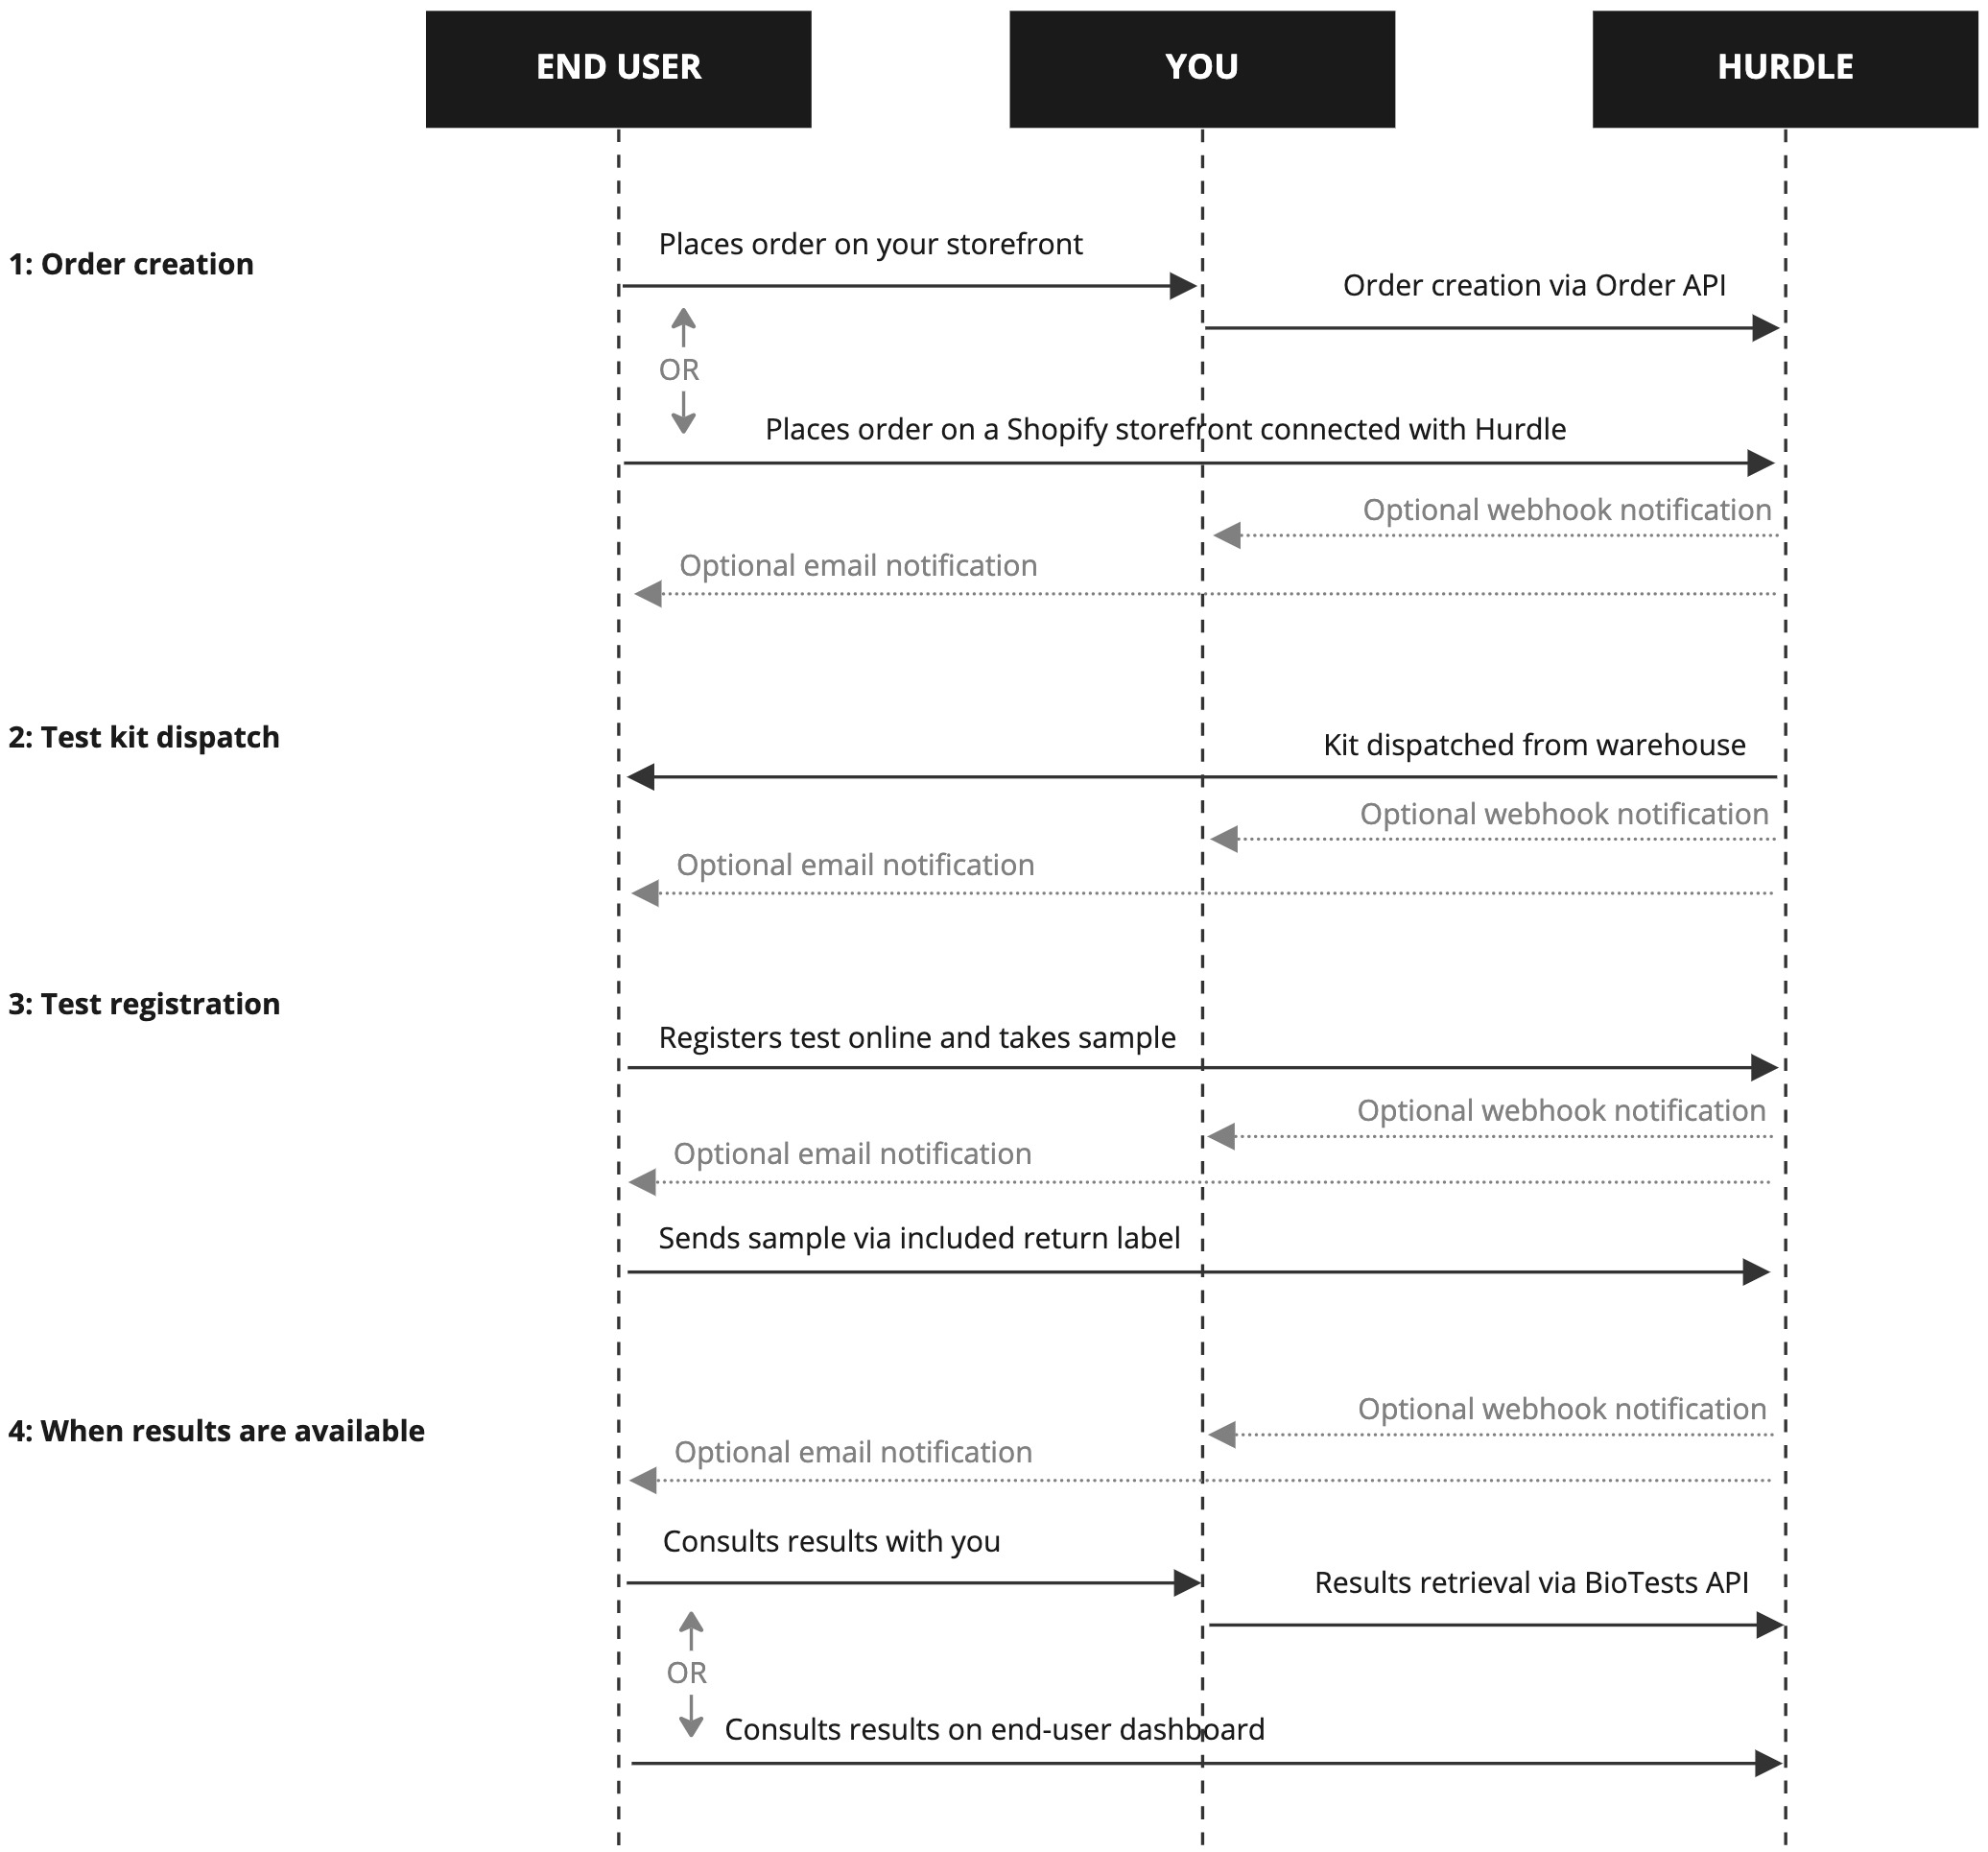
This page will guide you through how a basic testing flow works, from ordering the test to getting results. The following diagram gives a general view on the process, but keep in mind there are many possible variations; one diagram cannot summarise all the possible scenarios. In particular, you may want to refer to the Welcome page to find out more about how you want to implement this flow.
If you're a lab looking to join our network (lab integrations)This page focuses on the perspective of customers of our Diagnostic-as-a-Service platform (which can include labs looking to reach new B2B and B2C audiences). If you're just interested in joining our network of labs, please refer to the dedicated section.

Typical flow for B2B and B2C partner integrations
Order creation
Everything starts with an order for a test to be sent to a customer. The order can be placed via our Orders API (see Order creation for an introduction), from a no-code Shopify Storefront, or from our turnkey Partner portal. The data necessary to place an order consists mainly of shipping details and quantity. You can optionally provide details of the user (who will take the test) at order time to avoid the need to register the test later on.
US-specific noteIn the US, the customer must be the person who will take the test, and the quantity ordered must always be 1. This is because the order must be approved by a physician for each specific person taking a test. Also for this reason, depending on whether you have physicians in our organisation, you will need to provide some data about the physician who approved the order; or we will have a physician from a partner network approve the order after the patient takes a medical survey.
In other markets (countries?regions?) the customer can simply be the receiver of the test kits, which can then be registered to other people as desired (e.g. to have an order for a whole family). There is no need for physician data in those markets.
Test registration
Once the end user receives the physical kit they must first register it before returning to the lab. We provide a ready-made flow that your customers can go through. That flow can be under the Hurdle brand, or customised to your own brand (see White-label customisation).
By default, users will have the option to create an account with us (but under your brand if using white labelling). If you already handle user accounts and logins on your side, however, you can seamlessly link user accounts by generating short-lived user tokens and embedding an iframe pointing to our registration flow with the right token. That way, accounts will be created in the background.
Alternatively you can:
- use our Registration API to register a test on behalf of a user.
- use auto-registration when the kit is dispatched, by providing the user's details when placing the order. This must be enabled by Hurdle at the product level.
Once the registration is complete, the lab receives an electronic lab manifest for the incoming sample, with the essential demographic information needed to process the sample correctly. The end user then ships the kit back to our lab with the pre-paid shipping method (instructions included in the kit and during the registration process).

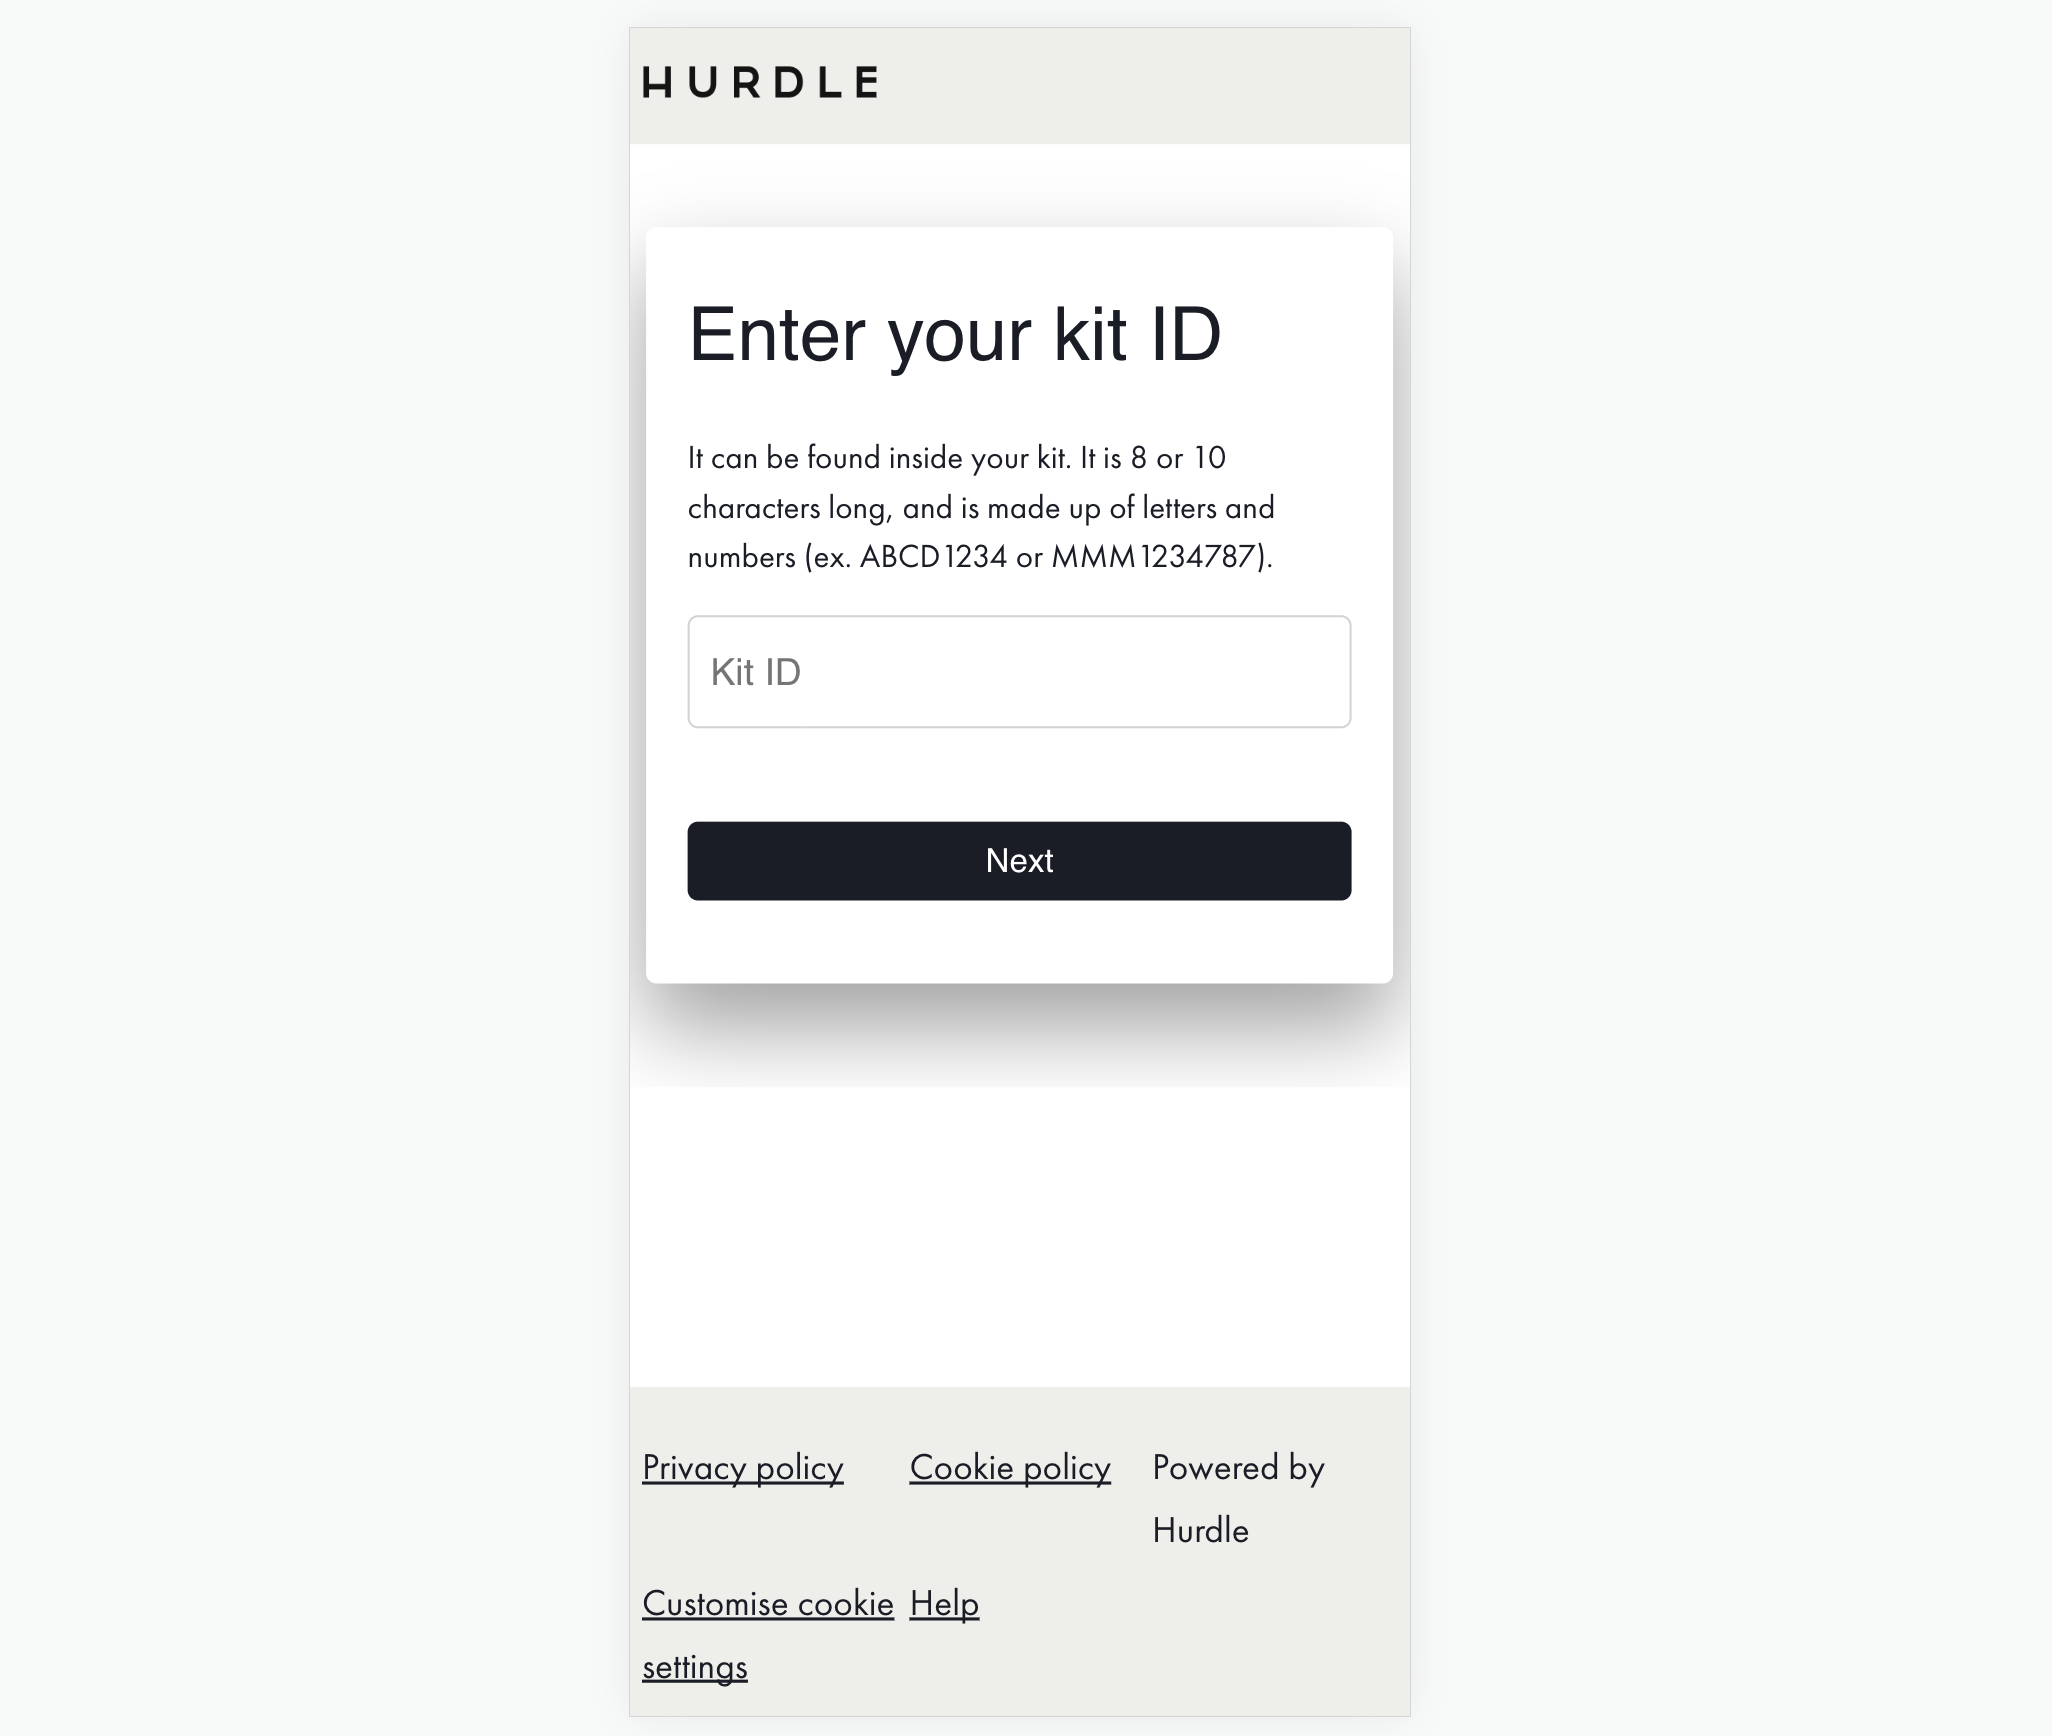
The beginning of a pre-built registration flow.
Retrieving results
Once results are ready, you and/or your customers will be notified via e-mail notifications or webhooks. You can then call the Bio Tests API to receive them (see Retrieving results).
Alternatively, the results can be consulted (depending on the use case):
- by someone from your organisation from the Partner portal
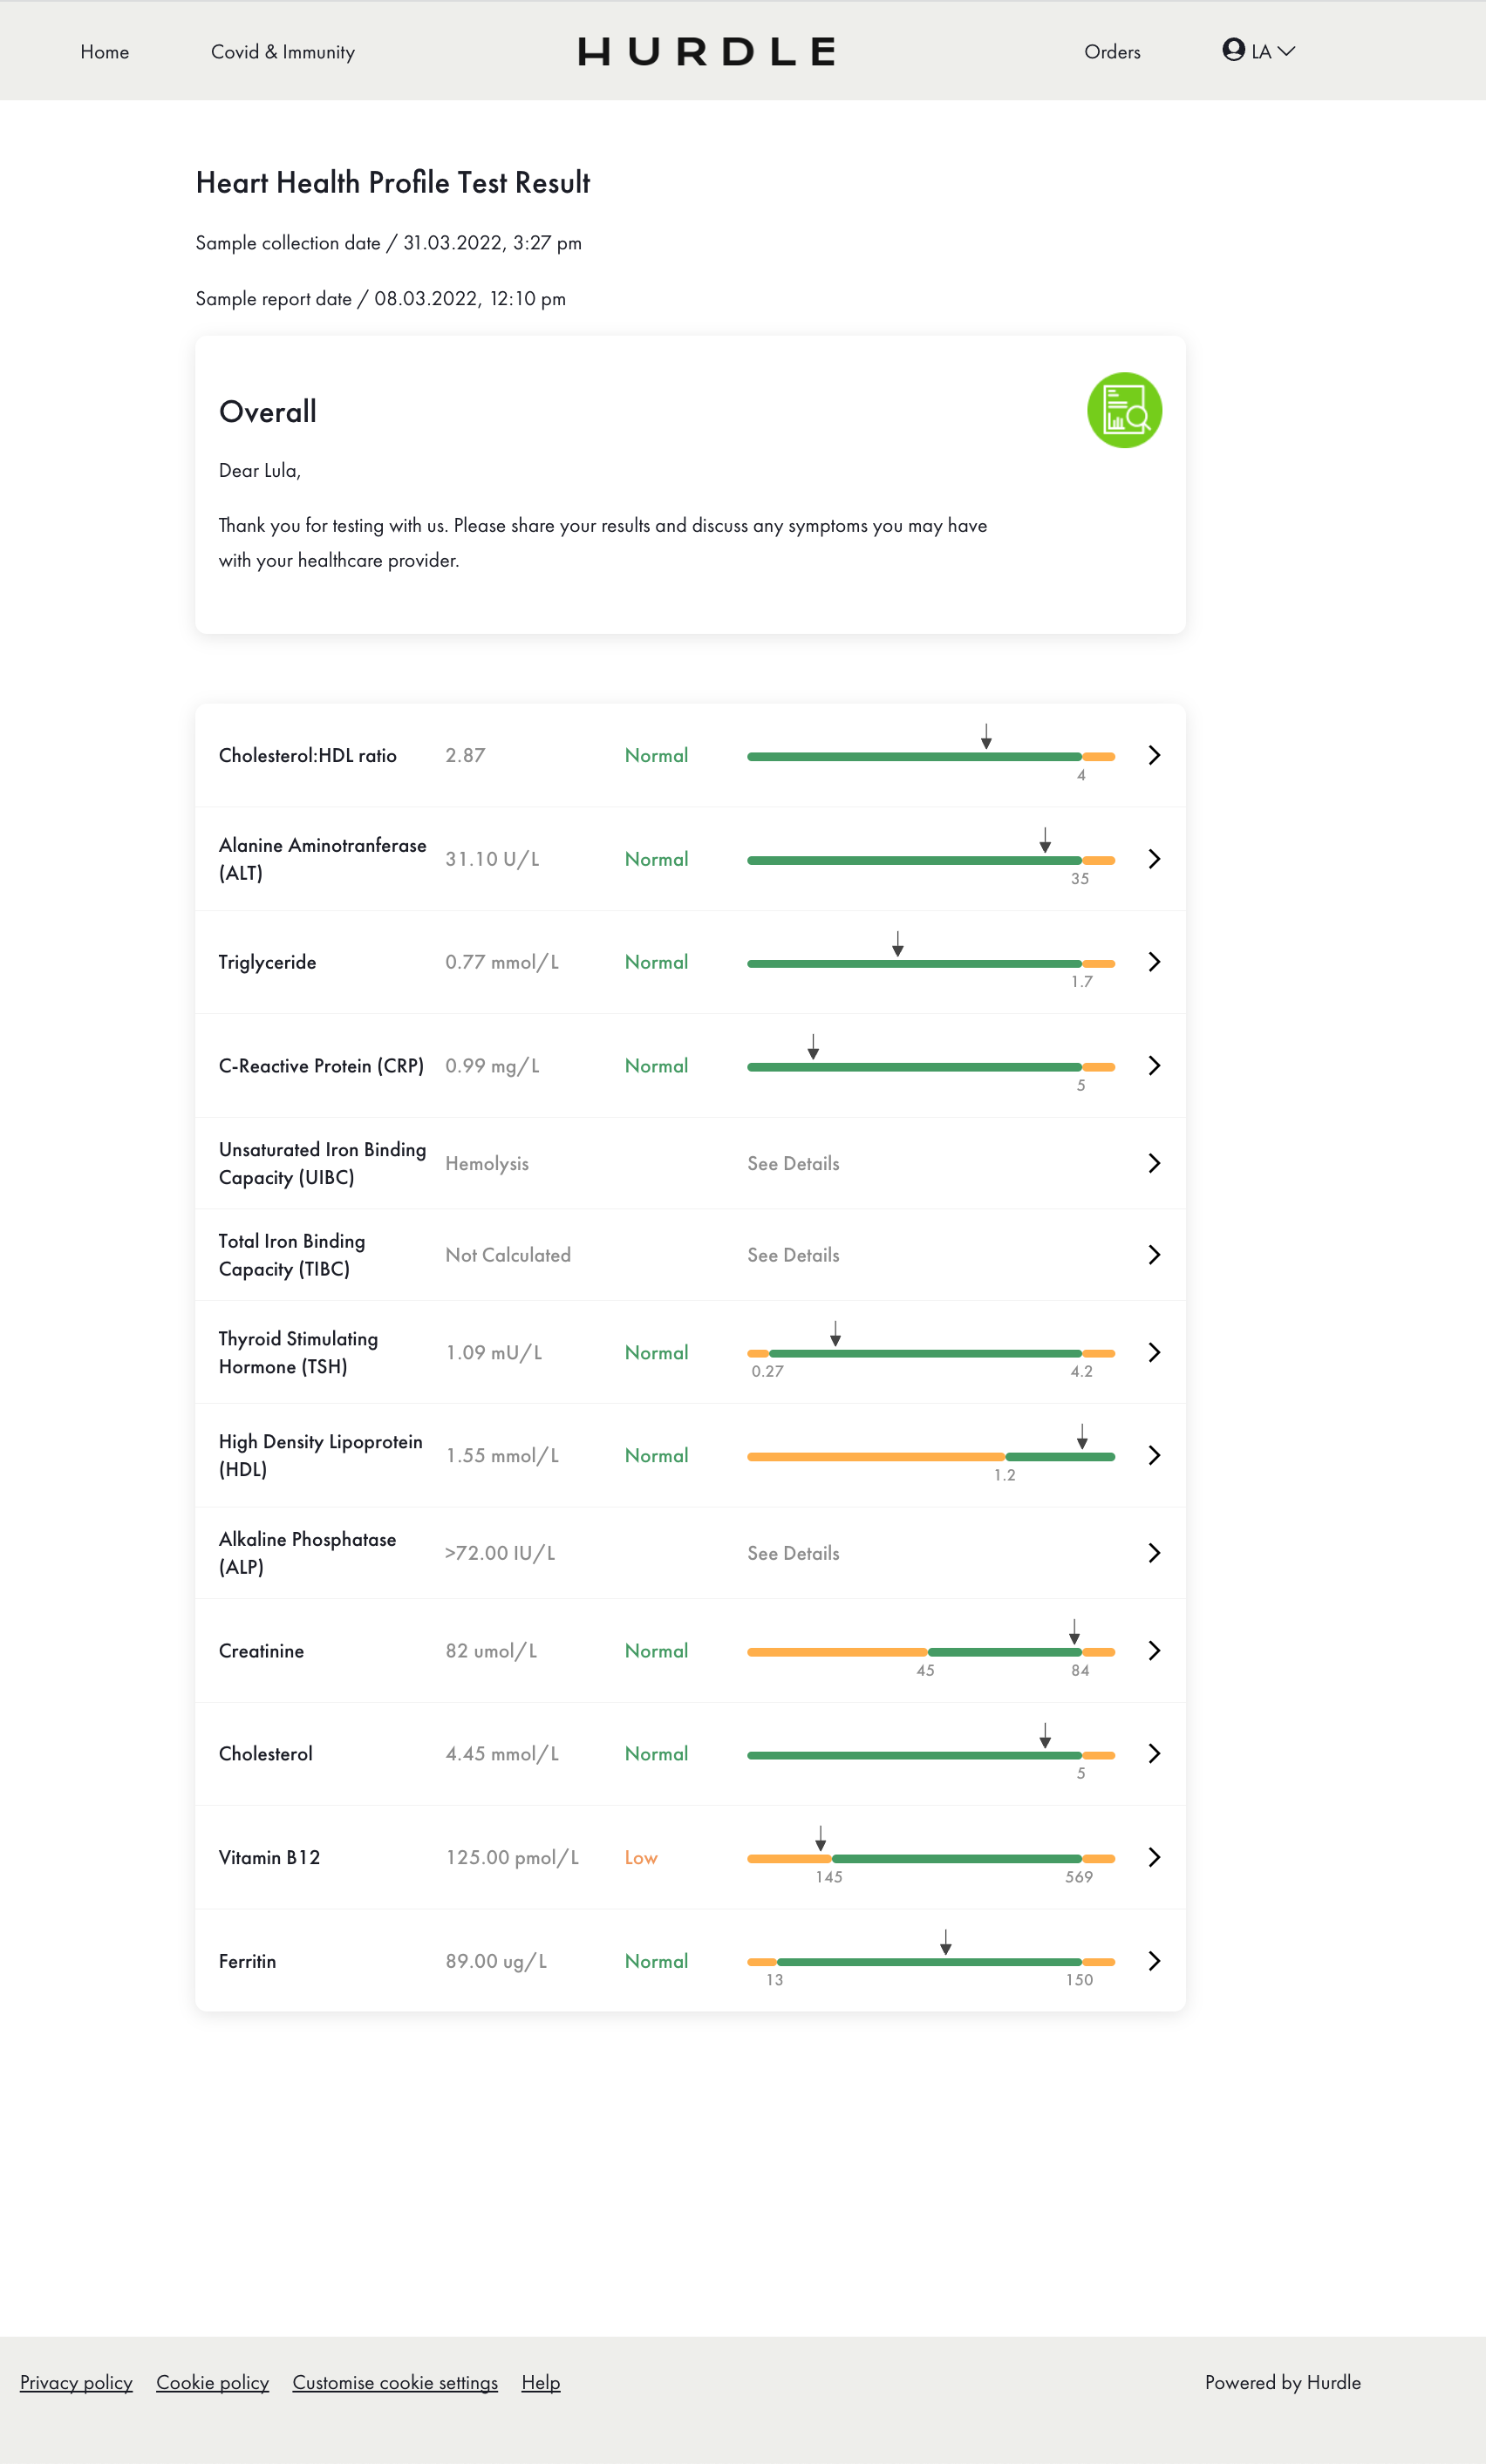
- by the end user themselves from the user dashboard

The user dashboard with the default Hurdle branding applied
Updated 4 months ago
